

So, now let's move on to chess openings in the Click-Storm Action Chess (further, important points in the text will be highlighted in bold italics).
The first thing I would like to recommend is to never allow pawns to be built in the shape of the letter V (see the picture below).
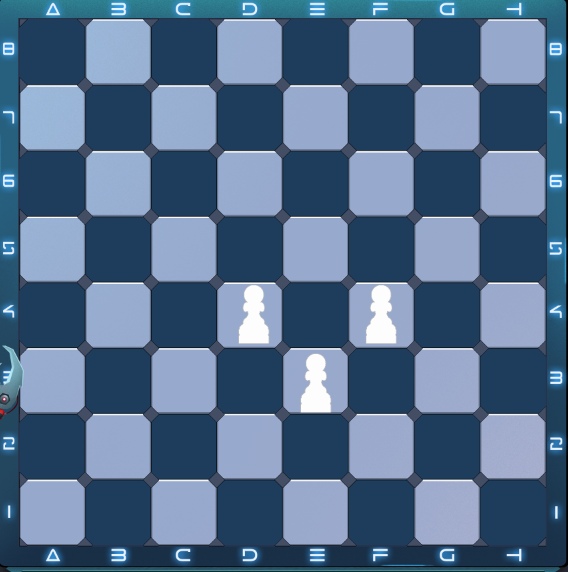
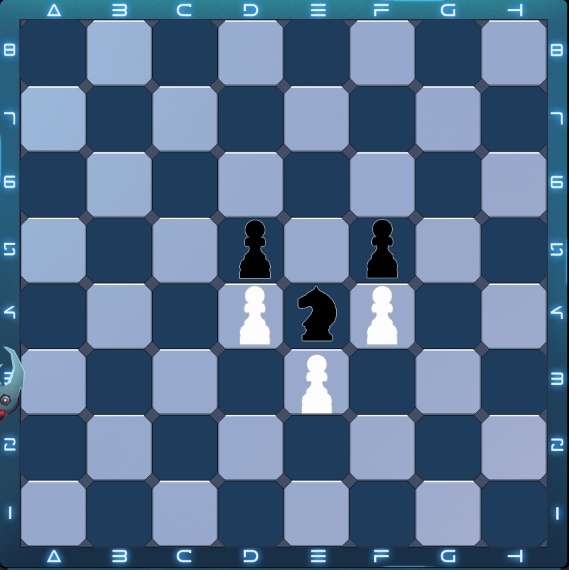
This arrangement of pawns allows the enemy to place the knight in the free space between them, which is not very favorable for us.
Also, when pawns line up with the letter V, they can close their bishop, which is also not very good.
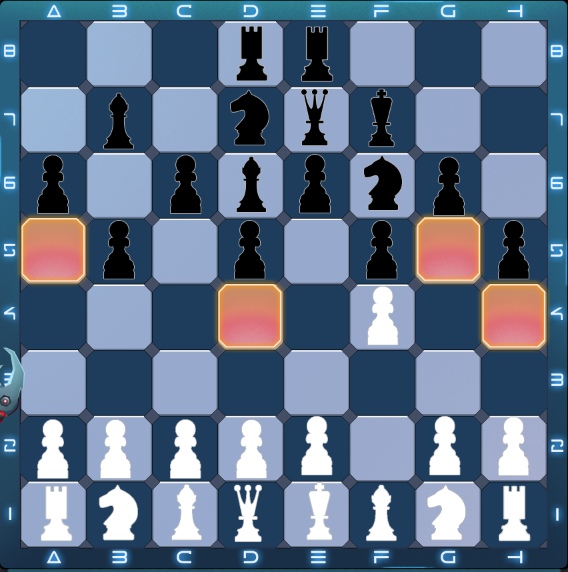
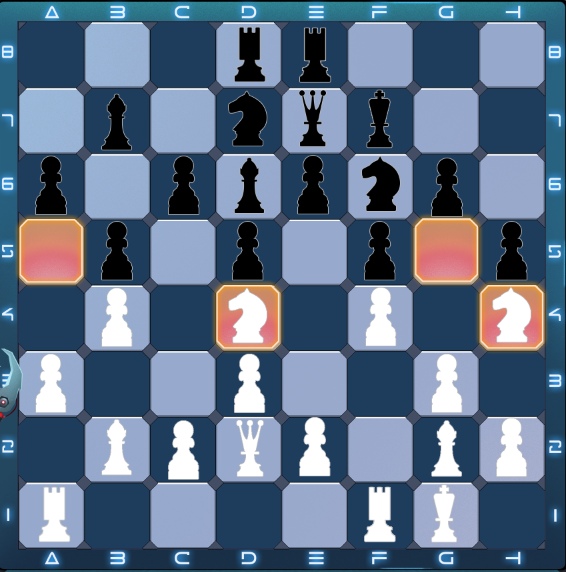
Therefore, the first thing you should try to do during your debut is to try to take control of the center of the field, i.e. attack the central cells with their pawns (highlighted in yellow):

Thus, you have 4 valid variants of the pawn game to attack one of these two squares.
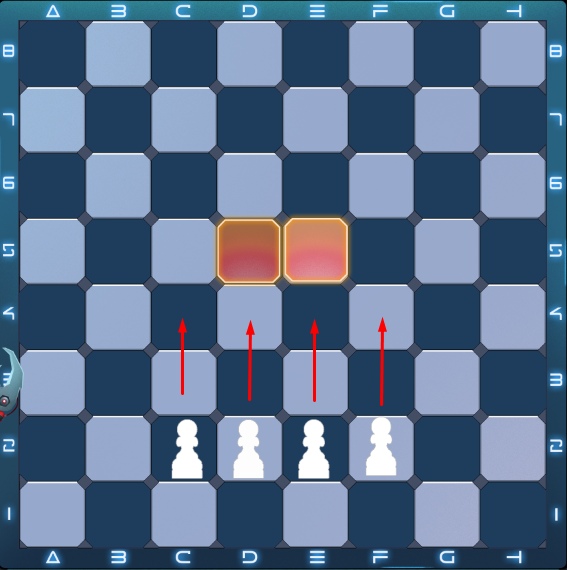
At least one of these pawns must go, otherwise, the opening will be weak. (if you play with two pawns in the same row, it is NECESSARY to act faster than the opponent, otherwise, you risk losing one of the pawns. Try not to go with other pawns, as this can lead to the V- we don't like form).
Next, you need to try to move the knights to those squares where it will not be possible to attack and that will cause the opponent to suffer. The most important thing in the opening is to move the knights to strategically advantageous squares.
So what does this mean? Let's look at White's debut as an example.
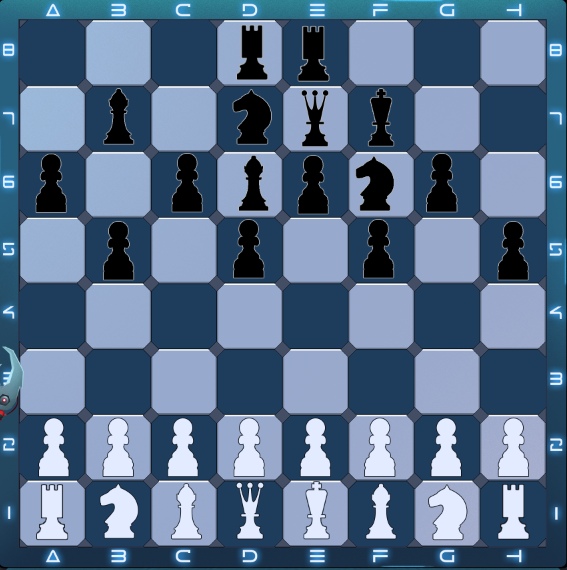
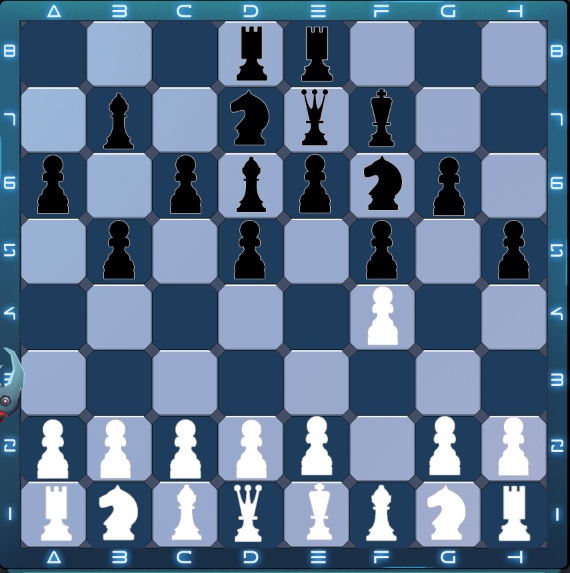
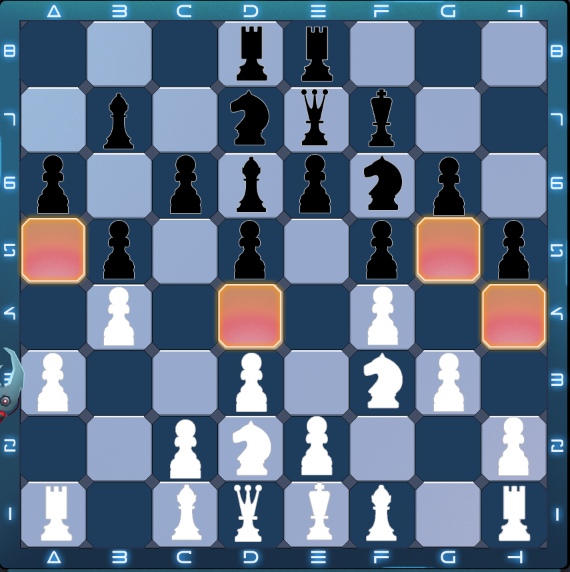
Suppose our opponent acted incredibly quickly and ended his debut before we moved even one piece. But there is nothing to fear! Surprisingly, he failed miserably with his debut! All his pawns formed the letter V and, also, the dark-squared bishop was locked by them. Now, as already mentioned, the first thing to do is attack the center by making one of the 4 pawns. We don’t want to put a pawn under the battle of two enemies, so the move f2-f4 looks the most logical. d2-d4 is also a good option.
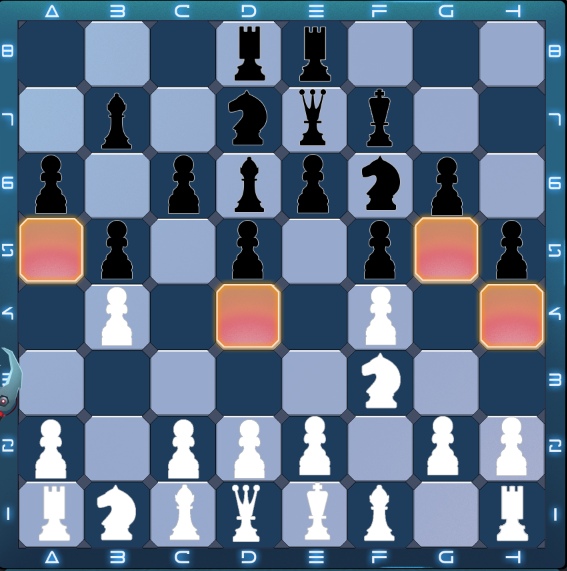
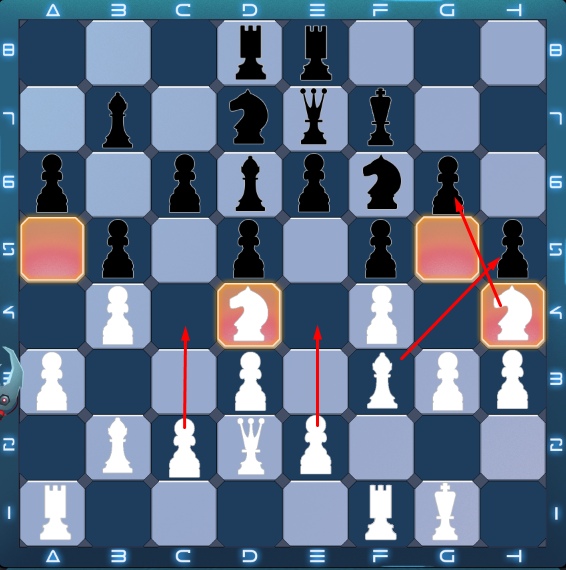
Step number 2. Move the knights to those squares where they cannot be attacked and where they give the enemy inconvenience. Since the knights should not be attacked and should attack the opponent’s pieces in the back rows, our choice is limited to the following cells (yes, the two fields on the right are controlled by the black queen, but your opponent will never exchange the queen to a knight, so here everything is order):
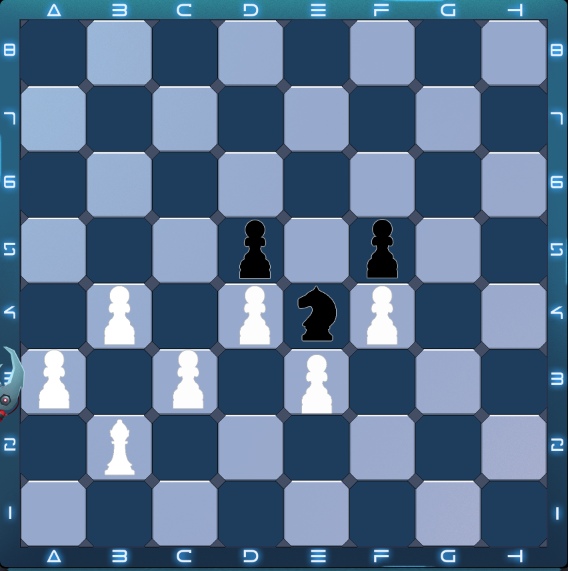
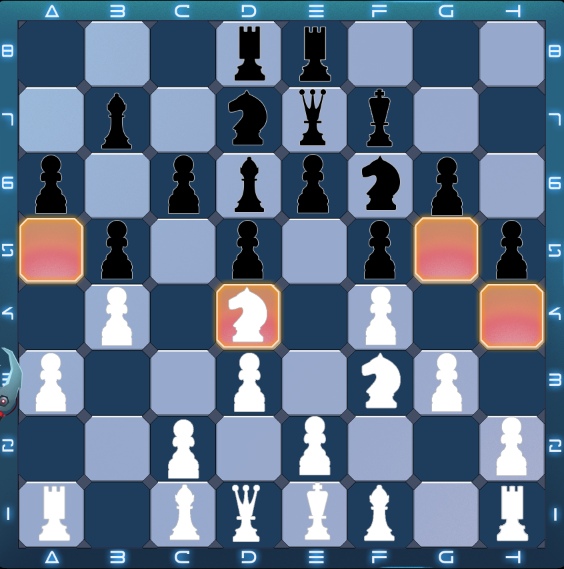
Now let's move one knight to the color square in the center, and the second to the far color square to the right (in fact, you can select any two squares). We need to put the pawn on b4 to prevent the opponent from attacking the central color cell and go knight on f3 so that he could precede the color square in the next move.
So, looking now at the board, we will see that both of our pawns are not protected. Therefore, we will go pawns on a3 and g3 to protect them from the black bishop.

Now you can safely walk a horse to a colored cage in the middle. Next, we need to put the second horse so that he can move to the far color square on the right. Therefore, we go a pawn on d3 and a knight on d2.
Two more moves and both knights will be on their squares.
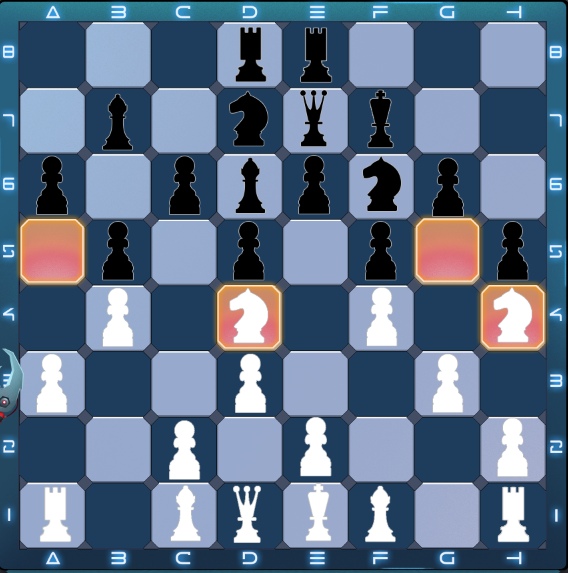
Now the knights are perfectly positioned.
We proceed to step number 3: it is necessary to put the bishops so that they attack as many pieces as possible. Therefore, it is advisable to place them on large open diagonals. In this debut, we have two options for the white-field bishop- b2 or e3, and the dark-field bishop will go to g2. (We chose b2, but e3 is also a good option).
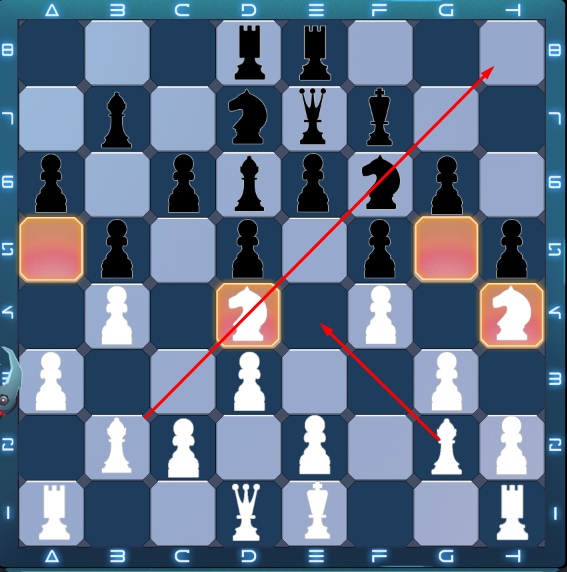
The arrows indicate the diagonals along which bishops can move. As you can see in the diagram, the black-squared bishop of white does not play a special role, but this is not scary since black bishops would have even fewer diagonals if they were drawn.
Now it remains to make a castling and queen to d2 to join the rooks.
Please note that Black has no safe moves to attack. The d3 pawn does not allow the knights to move to c4 and e4. White can go h3 if Black suddenly goes knight to g4. Black became an easy target, although he started to go first.
From this moment on, White has many options for developing an attack. You can transfer the elephant to f3, threatening a combination on the kingside with the participation of a knight and a bishop (although at the moment it does not pass). You can break through pawns through c4 or e4, or even g4 after the preliminary h3, here already at the discretion of the player playing with white. Most importantly, now White controls the whole game. And all thanks to our leadership.
Attack options for both sides: (Black has no options left)
So far the combination is incorrect, but if the black knight moves away with f6 ...
Strategy Examples in Click-Storm Action Chess. Part 4
Other Click-Storm Action Chess content is in the article below:
Last Opinions